
Vermicomposting with Kitchen Scraps: A Simple Guide to Sustainable Living
Living a sustainable lifestyle is becoming increasingly important in today’s world. One way to reduce waste and create nutrient-rich soil for your garden is through vermicomposting, particularly with kitchen scraps. Vermicomposting involves utilizing worms, specifically red wigglers (Eisenia fetida), to break down organic matter. Not only does this process help divert waste from landfills, but it also produces a valuable substance called vermicast that can be used as a natural fertilizer. In this article, we will guide you step by step on how to start vermicomposting with kitchen scraps.
1. Choosing the right bin: Begin by selecting a suitable bin for your vermicomposting setup. Opt for a container made of plastic or wood that has good drainage and ventilation. Size-wise, consider starting with a 2-foot square bin which can accommodate approximately one pound of worms.
2. Bedding material: Worms need bedding material to thrive and reproduce effectively. Shredded newspaper, cardboard, coconut coir, or leaves make excellent choices for bedding due to their high carbon content.
3. Moisture control: The bedding should be kept moist but not overly wet or dry; aim for the consistency of a damp sponge. To achieve this balance, lightly spray water on the bedding whenever it starts drying out.
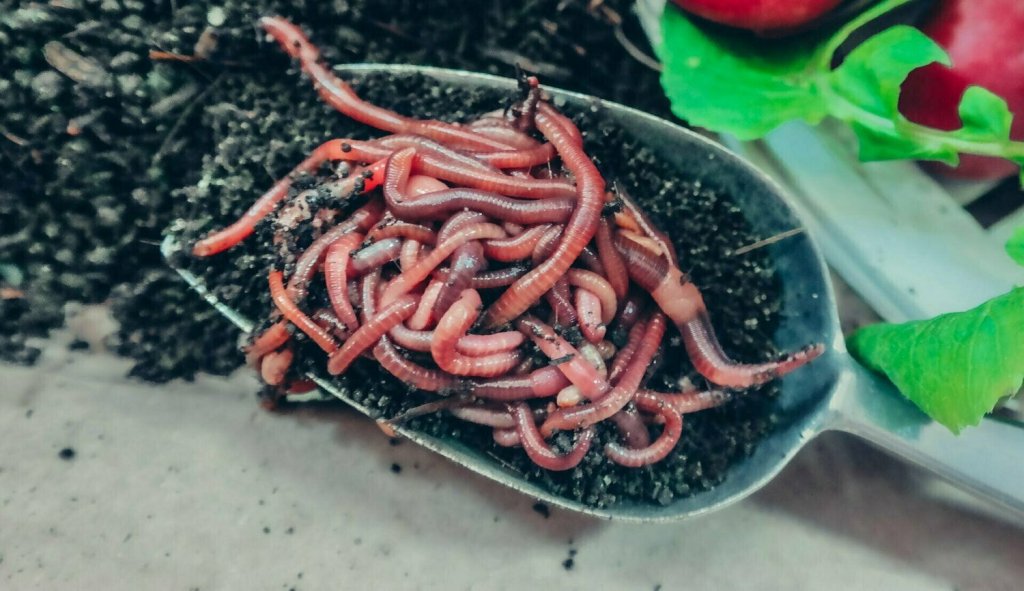
4. Introducing the worms: Once you have prepared the bedding in your bin, it’s time to introduce the red wigglers into their new home! Start with 500-1000 worms depending on the size of your bin and gradually increase their population over time.
5. Feeding your worms: Red wigglers are voracious eaters and will consume most kitchen scraps such as fruit peels, vegetable trimmings (excluding onions and citrus fruits), coffee grounds, tea bags (remove any staples), crushed eggshells, and even small amounts of paper towels. Avoid feeding them dairy products, meat, oily foods, or anything that can attract pests.
6. Feeding schedule: Initially, feed your worms small amounts every few days until they become acclimated to their new environment. Once they are settled in, you can increase the amount of food gradually.
7. Burying the scraps: To prevent odor and pest problems, bury kitchen scraps under a layer of bedding material within the bin.
8. Maintaining optimal conditions: Vermicomposting requires consistent monitoring of temperature and moisture levels. Keep the bin in a cool area away from direct sunlight to maintain temperatures between 55-77°F (12-25°C).
9. Harvesting vermicast: After a few months (typically 3-4), your worm population will have multiplied while also producing valuable vermicast or worm castings – an incredibly rich organic fertilizer for your plants! To harvest it, gently push all the contents to one side of the bin and add fresh bedding on the other side with food scraps. The worms will migrate towards their new home, allowing you to collect the vermicast from the emptied section.
10. Using vermicast as fertilizer: When using vermicast as fertilizer in your garden or potted plants, mix it with potting soil at a ratio of 1 part vermicast to 3 parts soil for seedlings or 1 part vermicast to 2 parts soil for established plants.
11. Troubleshooting common issues: If you notice foul odors emanating from your bin, it could indicate overfeeding or excess moisture; adjust accordingly by reducing food waste or adding dry bedding material.
12. Expanding your operation: As you gain confidence in managing your vermiculture system successfully, consider expanding by adding more bins or increasing worm populations for larger-scale composting needs.
Vermicomposting with kitchen scraps not only reduces waste but also provides you with a sustainable solution for enriching your garden soil. By following these steps, you can easily establish and maintain a vermicomposting system at home. Enjoy the benefits of nourishing plants while contributing to a greener planet!

Leave a comment